SAP Classification Explained Part 1: Classification Basics and Transactions
2013-02-05 ABAP Classification
This is the start of a several-part series in which I want to give an in-depth explanation of the classification functionality in SAP ERP®. Starting with this post, where I give an overview of the topic and mention important terms, I will go through the data model and demonstrate how to read data from classification and how to set up authorization.
Unsere Literaturempfehlung
SAP – Der technische Einstieg: SAP-Technologien und Konzepte
Sind Sie neu in der SAP-Welt und möchten schnell mitreden? Mit diesem Buch finden Sie sich erfolgreich im SAP-Umfeld zurecht! Sie steigen direkt in die Konzepte und Technologien der SAP-Software ein und lernen die unterschiedlichen Systeme und Prozesse kennen. Schritt für Schritt zeigen die Autoren Ihnen die wichtigsten technischen Aufgaben und die Zusammenhänge zwischen den Objekten. Dank der vielen Beispiele und Abbildungen finden Sie sich schnell im SAP-Umfeld zurecht und können direkt in SAP ERP oder SAP S/4HANA anfangen.
Bei amazon.de ansehen →

In the first part of the series, I’d like to give you a general overview about what the SAP ERP® classification can do. In plant maintenance, we often have a situation where we manage many different objects of the same kind, which have the same specific properties and require to be handled the same way. Let’s say we want to maintain our company fleet as PM equipments, which is not uncommon to do. Cars have very specific properties, such as color, number of doors, fuel type, et cetera. With classification, there is an easy way to maintain this in the equipment master data transactions (and much more, as we’ll see) without doing any development or customizing. Instead, we follow these steps to set up classification for our object.
Maintaining characteristics – transaction CT04
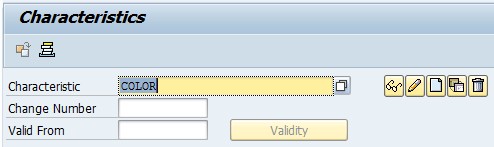
Characteristics Maintenance
To add custom data to objects, the first thing we need to do is create Characteristics for it. A characteristic describes a specific property of an object. For a car, you might want to create a characteristic called “COLOR” to maintain the color of your cars.
Basic Data for Characteristics
When creating a characteristic, you can choose between different data types. The system offers you data types for character fields, currency, dates, numbers, or time. Depending on what data type you pick, you can further refine options for the characteristic field. In this case, the character field we choose lets us enter the maximum number of characters as well as an indicator for case sensivity.
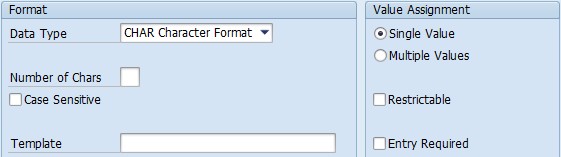
Restrictions for a Characteristic
It’s also possible to mark the characteristic as multi-value. In this case, it can be entered more than once for any object (which doesn’t really make sense for color). The “entry required” indicator will make this characteristic mandatory during classification.
Value Control
In the Values tab, we have very detailed control over the values that the characteristic will allow. By clicking the Other Value Check button, we can pick four ways to suggest or restrict the values.
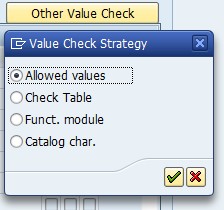
Methods to Verify Characteristic Values
Allowed Values
This way of value control allows to create suggestion values for characteristics that the user can pick from during object classification. By unchecking the Additional Values box it’s also possible to restrict the possible values to only the ones listed in this tab.
Check Table
A table which contains the allowed values can be named here. It must have exactly one field and its data type must correspond exactly to the characteristic’s data type.
Function Module
A function module can be entered here that allows the implementation of custom logic to check the characteristic value. This is by far the most sophisticated (and work-intensive) way to check the values for a characteristic in SAP ERP®. More information on how to do this can be found in the F1 help for the function module name field or here: Function Module Interface.
Catalog Characteristic
Via the Catalog Characteristic strategy, the characteristic can be linked to a Selected Set. A Selected Set can be created using transaction QS51. It can contain codes from multiple catalogs, which then restrict the possible values of the characteristic if the set is linked. However, it only works for catalogs 1 (Characteristic Values) and 3 (Usage Decisions, this is needed in the QM calibration process).
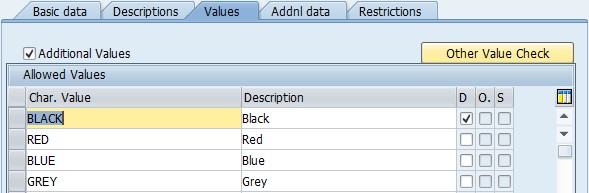
Allowed Values
In our case, we use the Allowed Values strategy to create suggestions for the colors our cars usually have, but leave the user free to enter more. Also, we set Black as the default by checking the respective box. Note how if we use this method of value assignment, the values are created as key/value pairs. This will have an impact on how the data can be read later on.
Additional Data for Characteristics
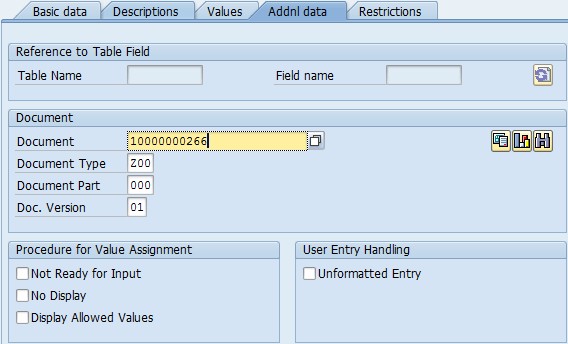
In the Additonal Data tab, you get even more control over the way the characteristic behaves during classification. You can link the characteristic to a table field, creating what is called a Reference Characteristic. If you do that, the properties (such as name, data type and possible values) are entirely deducted from the data element of the field you linked to; any previous entries are overwritten. You can also link to multiple table fields, extending the value possibilities to all the tables entered. However, the referenced fields must have exactly the same data type.
In addition to that, links to documents can be added here. This can be displayed by the user during classification for additional information – in our case, we can add a color chart. Furthermore, you have some control over how (or if) data is entered. You can set the characteristic to display-only or hide it entirely. Obviously, this only makes sense if the characteristic value is inferred from another characteristic, something that I will probably cover in a later article.
Additional Data for Characteristics
Restrictions
If you create a characteristic, it can be used in all classes, as we will see in the next chapter. It is, however, possible to restrict the classes that the characteristic can be used in. This is done on the Restrictions tab.
Creating a class – transaction CL02
Characteristics cannot be assigned directly to objects. To do that, we need to add them to a Class first – hence the name Classification. Classes are maintained in transaction CL02. The first thing you will need to do is pick a Class Type. The Class Type you pick determines which objects can be classified with this class (and many more things, actually – this will be covered in another part of this series). SAP ERP® comes with a bunch of Class Types already prepared. In this case, I will use the Class Type 002, which allows me to classify equipments.
Basic Data
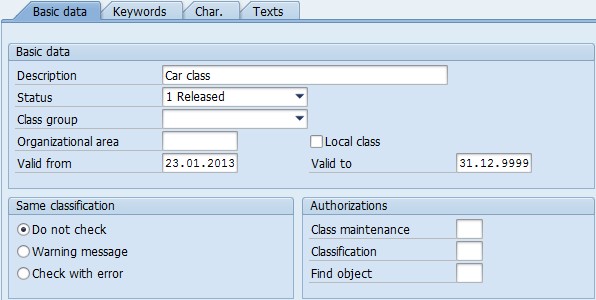
The basic data of a class includes a description, a status (only classes with status Released can be used in objects), a group for quicker class search, the possibility to check for identical classification values, and organisational area, as well as some authorization data (which we will use in a later part of this series). All we really need to enter here is a short description.
Class Basic Data
Keywords
It is possible to enter keywords for a class that can be used when searching for classes – this is done here.
Characteristics
The Characteristics tab is where we get to the core of classification. To add characteristics to a class, they must be entered in the list displayed here. They will be available later during classification of an object. You can also some additional control data here.

Adding Characteristics
The overwrite functionality should be mentioned here as well. By pressing the Overwrite Characteristics button at the bottom of the list, you will be taken to the characteristic maintenance screen. However, the changes you make here will only apply to the characteristic if it is used in the context of the particular class you’re editing. It will remain unchanged on other classes where it is used. The same also works for the characteristic values – with the Overwrite Values function, you can modify the existing characteristics without influencing the usage of the characteristic in other classes.
You should note, however, that this creates additional complexity and maintenance effort – in some cases, it might be better to create new characteristics. If , for example, the original characteristic values get updated, the changes will not be taken over automatically to the overwritten characteristic. Instead, you will need to access the characteristic from the class via the Overwrite Values button and then use the function Extras → Overwrite → Update Values to take over updated data from the master characteristic.
Assigning an object to a class – transaction CL20N
Now that we’ve created a class with a characteristic in it, it’s time to assign it to an object so we can enter some values. This can be done in most object transactions; I could classify my equipment in IE01/IE02 as well. Here, however, I will show the more general approach: using CL20N. The first thing we will need to do, again, is pick a class type that determines which object to classify.

Assign Objects to Classes
After having entered the object, we can select the class(es) which we want to assign. By setting the Standard Class indicator, we can tell the system to display the characteristics of this class by default if the object is assigned to more than one class. We also have the possibility of setting a classification status that restricts if and how the object is found in classification search. With this it’s possible to mark a classification as incomplete, retrieve additional needed data and come back later to finish it.
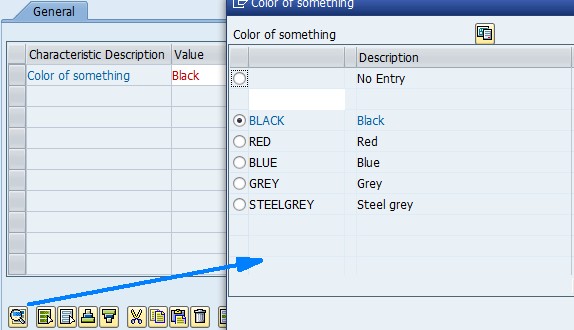
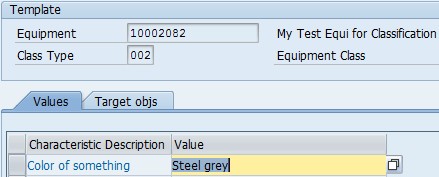
When that is done, the characteristics that we assigned to the class are listed below the class selection area. They can be assigned values there, depending on which methods of entry and value check strategies we chose. Since we’ve suggested allowed values for our COLOR characteristic, these are supplied in a pop-up window here. When you click the Document (original) button at the top, the document that was linked to the characteristic is displayed to support the user when making his choice.
Maintaining Characteristic Values
Mass classification – transaction CL24N
Of course, it’s rather tedious to assign objects to classes one at a time. That’s what transaction CL24N is for. Instead of choosing an object and assigning multiple classes to it, we can pick a class and assign multiple objects to it. However, the valuation of characteristics must still be done one at a time. There must be a better way to do this…
Mass valuation of objects – transaction CLMM
Copy Characteristic Values
And of course there is – transaction CLMM allows us to perform a mass valuation of objects or copy the valuation of one object to many others. That makes classification of multiple objects quite convenient.
Finding objects via classification
When working with classified objects, of course it is important to be able to find them according to their characteristic values. SAP ERP® offers two transactions to deal with this. These are CL30N – Find Objects in Classes and CL31 – Find Objects in Class Type.
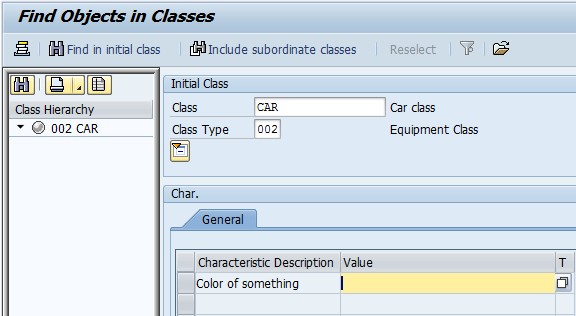
Transaction CL30N will let you search for objects in a specific class. You can enter the class type and class and will be able to set filter criteria for each characteristic in that class. This transaction is also the only one where overwritten values are searchable, because the characteristics will be loaded in the context of one specific class.
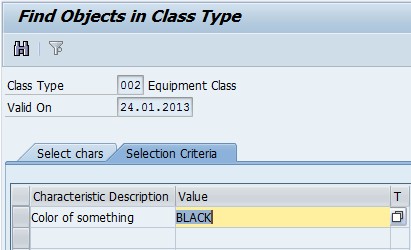
Find Objects in Class Type
On the opposite, transaction CL31 lets you search for objects in a class type. Here, you have the advantage of being able to enter characteristics from multiple different classes – very useful if you’re using multiple classes for objects. However, characteristics are not loaded in the context of a class, so overwritten values will not be available as search criteria.
More interesting topics
Where-Used List and Object List
There are some more interesting transactions in the classification environment that can help you find what you look for. One of those is the transaction CT12 – Where-Used List of Characteristics. It is a flexible way of finding various elements where characteristics are used, such as classes and classified objects. It is thus another means to find classified objects in SAP ERP®, this time using the prettier ALV tree structure.
Another nice transaction to know is CL6BN – Object List. It gives you another convenient way to get a quick overview about classified objects of a certain type and their valuation.

Classification Object List
This concludes the first part of my series on classification. It was a general introduction to the classification functionality in SAP ERP®, giving an overview about the most frequently used features. In the next part, I will address the developer community when I discuss the data model of classification and show you how the classification system is reflected in the actual database tables.
Read on…
You can find more information on SAP ERP® classification here: